Growing marjoram is a delightful addition to your herb garden. It is a versatile and flavorful herb for your culinary creations. In this guide on how to grow marjoram, we take you through everything you need to know to grow beautiful and delicious plants. You’ll soon enjoy this fresh herb in your kitchen.
Marjoram, Origanum majorana, is a versatile herb in the mint family (Lamiaceae). It is closely related to oregano, and comes in several varieties, each with unique characteristics.
With a sweet, mild citrusy flavor, marjoram is used a wide variety recipes. My favorites are almost any tomato base, chicken dishes and on vegetables. But don’t limit yourself as this delightful herb can be found in many culinary creations.
A tender perennial, marjoram is often grown as an annual since it struggles to survive in colder climates. With proper care and attention, you can enjoy this wonderful plant in your dishes.
Marjoram Basics
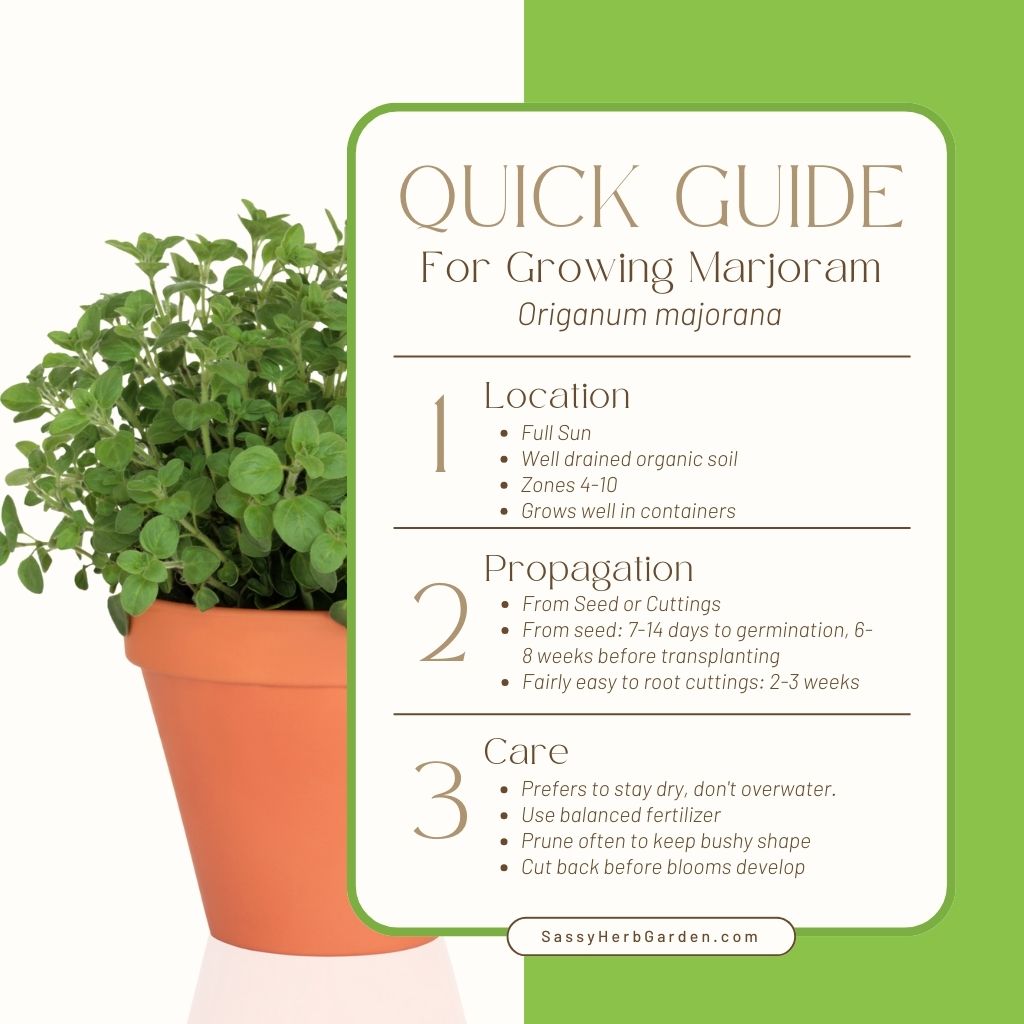
To successfully grow marjoram, choose a sunny location in your garden that receives full sunlight and has well-drained soil. You can start your seeds indoors or transplant seedlings outdoors after the last frost. Remember to water regularly without overwatering.
Keep the plants trimmed by cutting the leaves throughout the growing season to encourage healthy growth. As your marjoram plants start to flower, trim them low to the ground to stimulate new leaves.
Sweet marjoram also grows well in pots so it is perfect for a kitchen window garden or patio containers. You can easily enjoy fresh marjoram all year round.
Starting Sweet Marjoram Plants
Marjoram is easy to cultivate. If you have the space and patience, you can get great results from starting your herb from seed. Since marjoram must be started indoors about two months before planting outside, many herb gardeners prefer to use nursery plants or start new plants from cuttings. As a tender perennial, it can also be propagated by root divisions. Let’s dive into how to grow marjoram here:
Starting from Seed
The advantage of starting marjoram from seed is that you can select from more varieties. And if you are planning to use marjoram as a ground cover, which will require many plants, starting plants from seed is much more cost effective.
Here are the steps to start marjoram from seed:
- Choose the right time: Start marjoram seeds indoors in early spring, 6-8 weeks before the last frost. Marjoram prefers a warm growing environment.
- Prepare seed trays: Use seed trays or small pots filled with a seed starting mix. Gently press the mix to ensure an even surface.
- Sow the seeds: Sprinkle marjoram seeds on the surface of the mix. Lightly press them down to make contact with the mix, but don’t bury them, as they need light for germination.
- Maintain moisture: Mist the seeds with water and cover the trays with a clear plastic lid or plastic wrap to maintain humidity.
- Provide light and warmth: Place the seed trays in a warm, sunny spot or under grow lights. Maintain a temperature between 60-70°F (16-21°C) for optimal germination.
- Monitor germination: Marjoram seeds usually germinate in 7-14 days. Once they sprout, remove the cover and ensure the seedlings receive enough light.
- Transplant seedlings: When the seedlings have developed two sets of true leaves, transplant them into larger pots. Wait until the risk of frost has passed before planting them outdoors 10-12 inches apart.
Growing from Cuttings: Step by Step
Growing marjoram from cuttings is my favorite way to bring herbs indoors for the winter. This also works well for spring plantings if you’ve kept a pot going in your window garden all winter.
- Take a cutting: Select a healthy marjoram plant and choose a 4-6 inch stem cutting with no flowers. Cut the stem below a leaf node, and remove the lower leaves.
- Apply rooting hormone: Dip the cut end of the stem into a rooting hormone powder. This step is optional but will increase the chances of successful rooting.
- Plant the cutting: Insert the cut end of the stem into a container filled with moist, well-draining potting mix.
- Create a mini greenhouse: Cover the container with clear plastic or a plastic bag to maintain humidity.
- Place in a warm, bright spot: Place the cutting in a warm, bright area, but away from direct sunlight to avoid overheating.
- Check for rooting: After a few weeks, you should see signs of new growth. Gently tug on the cutting; if it resists, the roots have formed. Once rooted, transplant the cutting into a larger pot and move to a sunny location.
Note that it’s important to take fall cuttings well before the first frost. Active growing stems root best. Once temperatures drop, this tender perennial will start to shut down for the winter and it will be difficult to root.
Propagating by Division: Step by Step
As a tender perennial, marjoram often returns on its own the next spring in warmer climates. If you are lucky enough to keep this herb going then you can also take root divisions to propagate marjoram. Root divisions are also a great way to bring in a smaller piece of this herb for your indoor winter garden.
- Select a mature plant: Choose a healthy marjoram plant that is at least one year old to divide.
- Wait for the right time: Divide marjoram plants in spring or early autumn to ensure the divisions have time to establish themselves before extreme temperatures set in.
- Dig up the plant: Carefully dig up the plant using a garden fork or a spade, keeping the root system intact.
- Divide the plant: Gently pull apart the plant into sections or use a sharp knife to cut through the roots. Each division should have a good amount of roots and foliage.
- Replant divisions: Plant the divisions into well-drained soil in their new location or pots containing potting mix. Water them well and continue to care for them as mature marjoram plants.
Preparing Your Garden for Marjoram Plants
Choose the Right Location
Select a sunny spot, with at least 6 hours of direct sun, in your garden for growing marjoram. Make sure the chosen area provides good air circulation to help prevent diseases and pests from affecting your plants.
Ensure Well-Draining Soil
Marjoram prefers well-drained soil with a pH level between 6.5 and 7.5. Improve drainage by adding organic matter or compost to your garden’s soil. This will enhance the soil structure and help retain moisture.
Keep in mind that marjoram does not like soggy soil. Avoid overwatering and ensure proper drainage to prevent root rot issues.
Companion Planting
Companion planting can be beneficial for marjoram and many plants in your garden. It helps improve the overall health and productivity of your garden. While marjoram can be planted with almost any other herb or garden plant, here are a couple of popular pairings:
- Tomatoes: Marjoram can enhance their flavor and help deter pests such as tomato hornworms.
- Basil: An excellent companion for increased flavor and pest deterrence, it can repel mosquitoes and flies too.
- Peppers: Marjoram can improve the flavor of peppers and boost their growth.
Growing Marjoram in Containers
Growing marjoram in containers is an excellent way to enjoy this fragrant herb in your home or on your balcony. With the right pot, soil, watering, and drainage, you can have a thriving marjoram plant.
Pot Selection
When choosing a pot for your marjoram, consider the following factors:
- Size: Marjoram can grow quite large. Select a container that is at least 12 inches in diameter and depth to provide adequate space for the roots to develop.
- Material: Opt for materials such as terracotta or ceramic, which allow for better air circulation around the roots. This helps prevent root rot and encourages healthy growth.
- Drainage: Ensure the pot has drainage holes at the bottom. These allow excess water to escape and promote proper air circulation around the roots.
Potting Soil
Marjoram thrives in well-draining, loamy soil with a slightly acidic pH of 6.0 to 7.0. You can choose from an organic potting mix or mix your own. To create the perfect potting mix for your marjoram, you can:
- Combine equal parts high-quality potting soil, compost, and perlite or vermiculite to enhance drainage.
- Add a small amount of peat moss or coconut coir to the mix to help retain moisture and maintain a slightly acidic pH.
By providing the ideal soil conditions, your marjoram plant will be well-equipped for healthy growth and development.
Watering
Consistent but moderate watering is essential for growing marjoram in containers. To maintain the optimal moisture level, you should:
- Frequency: Water your marjoram plant when the top inch of soil feels dry to the touch. This may be about once or twice a week, depending on the ambient temperature and humidity.
- Deep watering: Thoroughly water the plant until water starts to flow out of the drainage holes at the bottom of the pot. This ensures that the water reaches the deeper root systems and prevents salt build-up in the soil.
Avoid over-watering your marjoram, as it could lead to root rot and other issues. Keep an eye on the moisture level in the pot, and adjust your watering schedule as needed.
Drainage
Proper drainage is crucial for the health and longevity of your marjoram plant in its container. To maintain good drainage:
- Place a saucer under the pot to catch any excess water that drains out.
- Elevate your pot on a stand or use pot feet to ensure proper air circulation and prevent any standing water from accumulating in the saucer.
- Monitor your plant for any signs of waterlogging or root rot, and adjust your watering practices accordingly.
By focusing on these four aspects – pot selection, potting soil, watering, and drainage – you’ll be well on your way to successfully growing marjoram in containers.
Caring for Marjoram Plants
Watering and Fertilizing
When it comes to watering your marjoram plants be aware they need consistent moisture, but overwatering can lead to root rot. Thoroughly water the plants then wait to water again until the soil is dry about an inch deep. Good drainage is critical to ensure the roots are not standing in water.
As for fertilizing, marjoram doesn’t require much. If your soil is well-draining and rich in organic matter, your plants will likely get the nutrients they need. However, if you feel your soil may be lacking, you can apply a balanced, organic fertilizer once or twice during the growing season.
Pruning
Regular pruning of your marjoram plants encourages bushy growth and prevents them from becoming too leggy. To prune, simply trim back the stems by a few inches throughout the growing season. This process will keep your plants looking tidy and ensure a continuous supply of fresh leaves for your home garden.
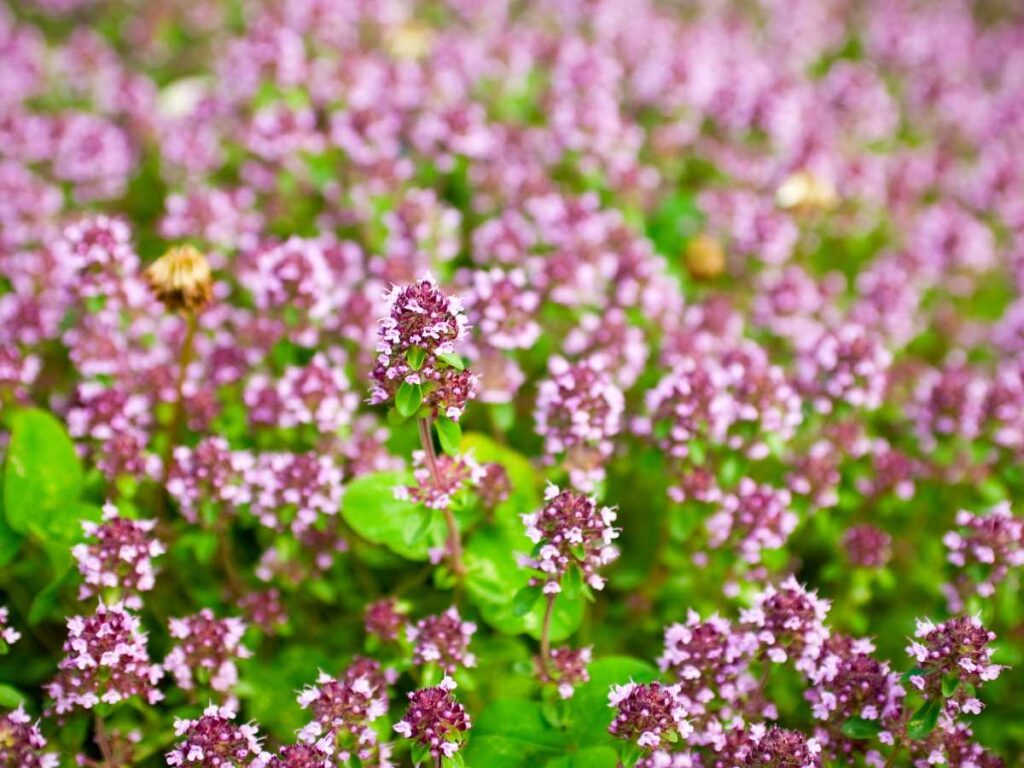
Pollinators
Marjoram flowers attract pollinators such as bees and butterflies. These beneficial insects will help your other plants, increasing the pollination and overall health of your garden.
However, the quality of the oils in the marjoram leaves drop once it flowers so if you want to use it as a pollinator plant plenty. That way you can use some for your culinary delights and leave some plants for the insects to enjoy.
Overwintering
As a tender perennial, marjoram needs to be well mulched going into winter if it has any hope of surviving. But don’t forget to pull back the mulch when plants start sprouting in the spring so the new plant gets plenty of air movement.
Common Problems and Solutions When Growing Marjoram
Common Pests
One common pest you may encounter when growing marjoram is spider mites. These tiny creatures can cause significant damage to your plants by sucking the sap from the leaves and stems. To effectively deal with spider mites, you can try using insecticidal soap. Follow these simple steps:
- Mix a few drops of mild liquid soap with water in a spray bottle.
- Shake well, and spray the solution directly on the affected areas of the plant.
- Be sure to spray the undersides of the leaves as well, as this is where the mites often reside.
- Repeat the process every couple of days until the spider mites are gone.
It’s essential to monitor your marjoram plants regularly to ensure no pests are making themselves at home in your garden. In addition to spider mites, keep an eye out for aphids, whiteflies, and thrips. These pests can also be managed using insecticidal soap or introducing beneficial insects, such as ladybugs and lacewings, to your garden to keep their populations under control.
Disease Management
Marjoram is generally not prone to many diseases. However, proper care and management of your plants can prevent some common issues that may arise. Here are a few tips to keep your marjoram healthy:
- Plant spacing: Plant with sufficient space between each marjoram plant to promote air circulation. This will help to avoid fungal diseases caused by excess moisture.
- Watering: Be mindful not to overwater your marjoram, as it prefers well-drained soil. Overwatering can lead to root rot or other fungal infections.
- Pruning: Regularly trim and prune your marjoram plants to prevent any overcrowding, which can encourage disease proliferation.
If you do happen to encounter a disease issue with your marjoram, it’s essential to act quickly to prevent the problem from spreading to other plants. Remove and dispose of any affected plant material and, if necessary, treat the remaining foliage with an appropriate fungicide.
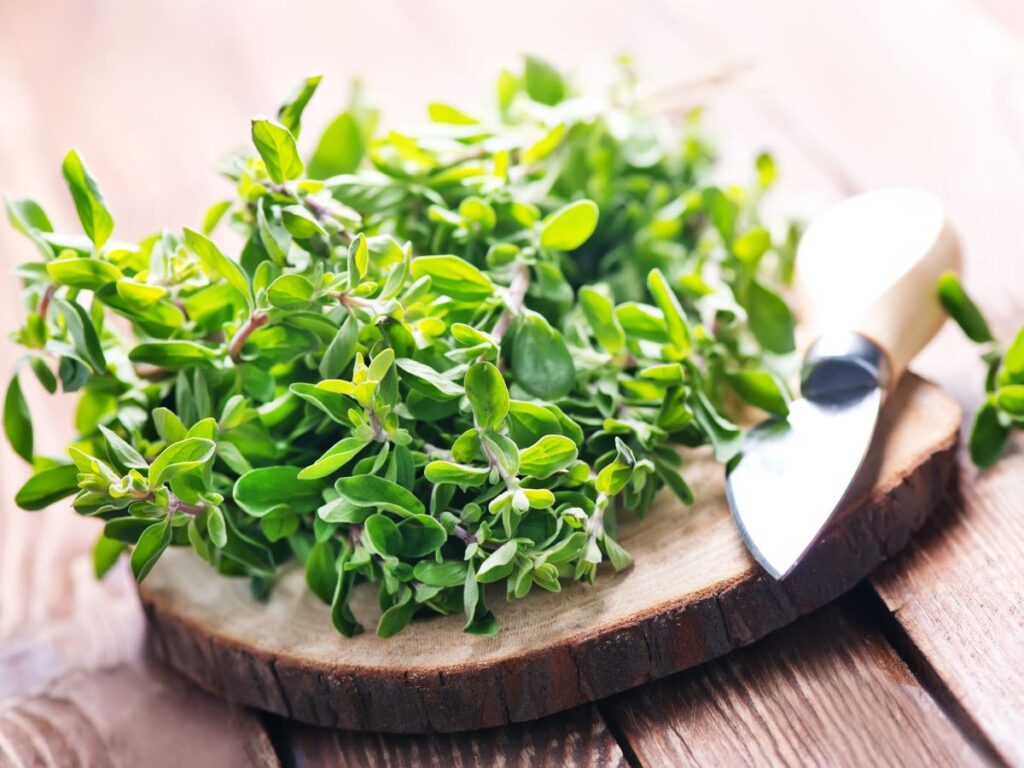
Harvesting and Using Marjoram
When to Harvest
Marjoram is usually ready for its first harvest mid-summer when the stems are 6-8 inches tall. You can continue harvesting marjoram leaves as the plant grows, Keep an eye on the flower buds; when they appear, it’s a good time to cut the plants back low to the ground to stimulate new growth.
How to Store
To store your freshly harvested marjoram, you have a couple of options. You can choose to either keep the leaves fresh or dry them for longer storage. If you want to keep the leaves fresh, simply wrap them in a damp paper towel and place them in a resealable plastic bag, then store them in the refrigerator. For drying, tie small bunches of marjoram and hang them upside down in a well-ventilated, dark area. Once they are completely dried, store them in an airtight container in a dark, cool place.
Culinary Uses for Marjoram
Marjoram has a savory, sweet, pungent aroma, adding a delightful flavor to your dishes. It works well as a seasoning for various recipes, such as meats, vegetables, and fish. Fresh marjoram leaves can be added to a variety of dishes, either whole or chopped, while dried marjoram retains its flavor, making it a versatile addition to your cooking.
Beyond using the marjoram leaves for seasoning, the flower buds can also be harvested and used in culinary applications. The flower buds of marjoram have a similar taste to the foliage, and they can be harvested just before they fully open. These delicate buds can be added as a garnish to dishes or mixed into salads to add flavor and visual appeal.
Frequently Asked Questions
What is the difference between Sweet Marjoram and Oregano?
The most noticeable difference is in the flavor. Marjoram’s flavor is milder and sweeter, while oregano’s flavor is spicy and more pungent. Otherwise, it is difficult to tell the difference. They are both from the Mediterranean herb family of Origanum with similar shapes and flowers.
What is the best soil for marjoram?
Marjoram prefers well-draining soil with a neutral to slightly alkaline pH level. To improve drainage and create favorable conditions, you can mix compost or organic matter into your garden soil. This will help your marjoram plants grow healthy and strong.
How much sun does marjoram need?
Marjoram thrives in full sunlight, needing at least 6 to 8 hours of direct sunlight each day. Choose a location in your garden that provides consistent sunlight exposure, ensuring optimal growth and flavor development in your marjoram plants.
Is marjoram an annual or perennial?
While marjoram is technically a tender perennial, it is often grown as an annual in colder climates, as it cannot tolerate freezing temperatures. In warmer regions, such as zones 9 and above, marjoram can be grown as a perennial.
When to harvest marjoram?
You can harvest marjoram leaves once the plant reaches about 6 inches in height and has a good number of healthy leaves. To ensure better flavor, it’s recommended to harvest marjoram just before the plant starts to bloom. You can continue to harvest throughout the growing season, as needed.
Pruning marjoram tips?
Pruning marjoram is essential to encourage bushy growth and prevent the plant from becoming too leggy. Cut the stems just above a node or a set of leaves to encourage new branch growth. Regularly remove the spent flowers to promote further growth and maintain a tidy appearance. If the plant starts to form flower buds, you can cut it back low to the ground to stimulate fresh, new growth.
Marjoram is an easy-to-grow herb. Not only is it a culinary delight but marjoram adds beauty to your garden. Vegetables, herbs, and insects also benefit from marjoram. This guide to how to grow marjoram will get you started so you too can enjoy this delightful herb.