The smell of dill evokes wonderful childhood memories of my mom surrounded by fresh cucumbers from the garden that she magically turned into jars of dill pickles. Obviously, it wasn’t that easy to create those pickles, but dill is definitely one of the easiest herbs to grow in your garden. And there are so many wonderful culinary uses for dill beyond pickles. So in this guide to how to grow dill, we’ll share the steps you need to take to successfully cultivate dill in your garden.
Dill is a great addition to your herb garden as it offers a unique flavor profile and some surprising health benefits. Let’s explore the benefits and uses of dill that make it a must-have for any garden.
- Dill is packed with essential nutrients like vitamin C, manganese, vitamin A, folate, and iron. Incorporating dill into your diet can help boost your immune system, ease muscle cramps, and reduce inflammation.
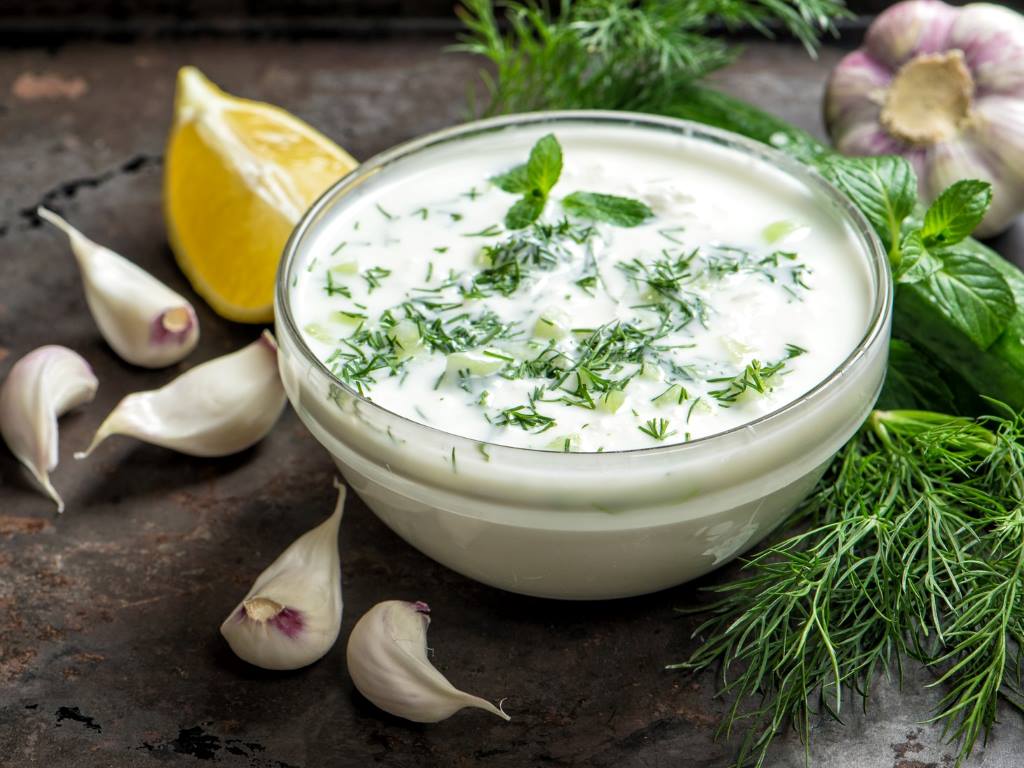
- Culinary uses for dill include pickles, salads, and sauces. You’ll love its fresh, slightly tangy, and aromatic taste. You’ll discover that dill pairs particularly well with fish, potatoes, and yogurt-based dressings. My favorite is a refreshing dill dip for summer parties.
- In the garden, dill is an excellent companion plant for plants in the cabbage family, onions, and lettuces. It repels common brassica pests like cabbage worms and loopers. At the same time, dill attracts beneficial ladybugs and bees.
- Dill attracts butterflies and moths because it is a great food source for their larvae.
- The feathery dill leaves are quite attractive when added to floral arrangements.
Growing dill in your garden has so many benefits and culinary uses. And you can’t go wrong with this easy-to-grow herb. So let’s look at how to grow dill so you can get started!
This article may contain affiliate links to products that we mention, if you buy something through one of those links we may earn a small commission at no extra charge to you.
Deciding Where to Plant Dill
When learning how to grow dill, the most important decision is selecting the location. In the right location, dill is very easy to grow and will practically take care of itself.
Selecting the Ideal Location
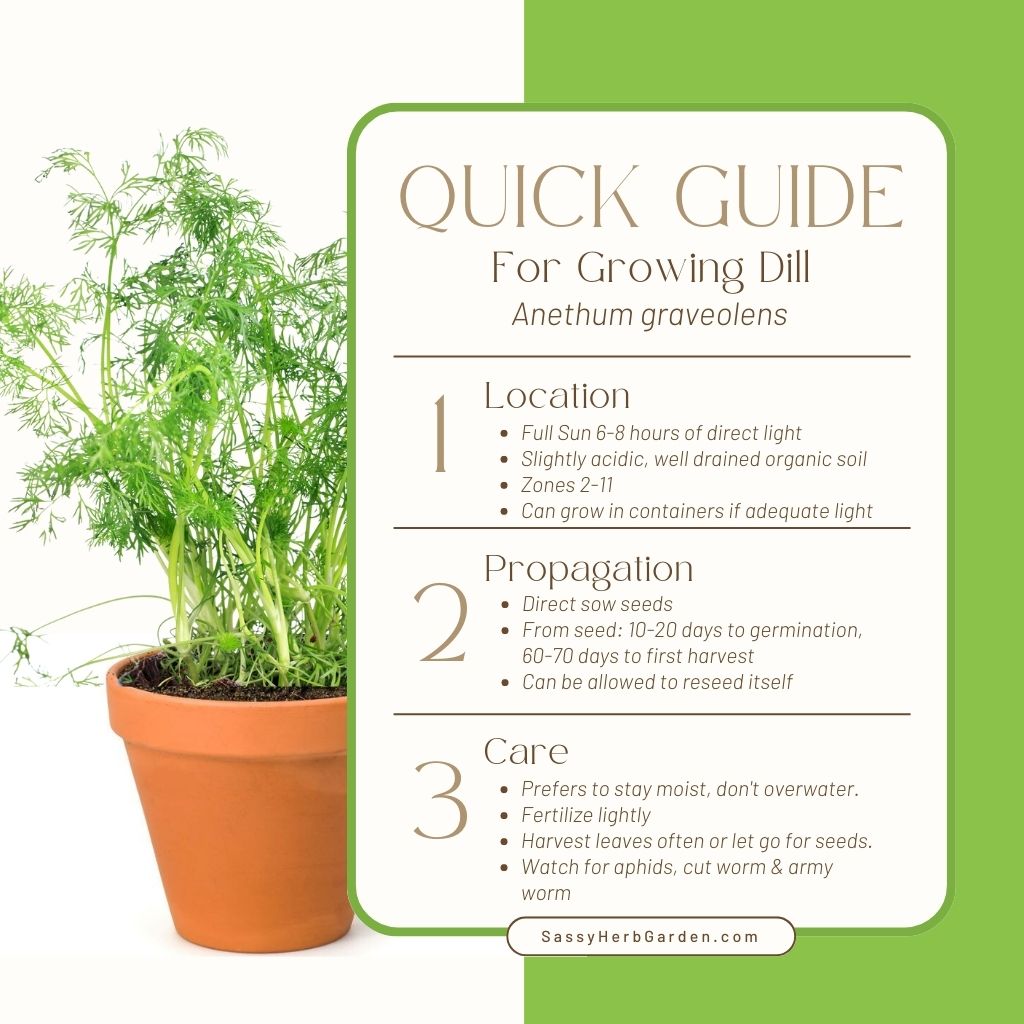
When growing dill, choose a spot in full sun. The more sun the better for this herb. Make sure the location receives at least 6-8 hours of direct sunlight per day.
You also need enough space for your dill to grow, as it will reach heights of 2-3 feet. The stalks of dill are hollow, which means they will bend in high winds so look for a place where your dill plants will be protected.
Avoid growing dill near other plants in the carrot family or near tomatoes since dill can stunt their growth.
Soil Preparation
Dill prefers well-draining soil with a pH level that is slightly acidic to neutral. It’s easy to use a simple soil test kit to test your soil’s pH and amend it if necessary.
Because dill weed likes to grow in moist soil, add in a lot of organic matter like compost or aged manure to enrich the soil. The organic matter helps hold moisture and improve drainage to avoid root rot.
Starting to Grow Dill from Seeds
It’s generally better to sow dill seeds directly into the garden because its long taproot doesn’t like to be disturbed.
- Directly sow the seeds into your garden after the last frost, with each seed 1/4 inch deep and spaced 1 to 2 inches apart. The soil covering the seeds needs to be very fine and kept moist with daily watering until the seeds germinate.
- Once the dill seedlings emerge, which is within 10-20 days, thin the seedlings to a spacing of 12 inches apart. At this point, you can start spreading out the time between watering until you are only soaking the dill plants twice a week.
- Start fertilizing after leaves emerge. Dill doesn’t need a lot of fertilizer so apply at 1/2 the rate recommended on the packaging. The plants will benefit from a balanced fertilizer, like a 10-10-10. Don’t use one that is extremely high in nitrogen.
- If you are growing dill to harvest the tasty leaves, plant a second round of seeds 2-3 weeks after the first to extend the growing season. Dill can grow well into the cooler fall temperatures. If you only plant for the seeds, the second planting cycle is unnecessary.
By following these steps on how to grow dill, you’ll be able to enjoy its fresh, fragrant leaves all season long!
Caring for Dill Plants
Dill is incredibly easy to grow after germination. By following these simple steps, you’re dill plants will be ready to start harvesting in 3-4 weeks.
Watering Dill
Dill plants need consistent moisture to grow well, especially during the early stages of growth. As a general rule, soak established dill plants at least twice a week. If you get a good rainfall that can take the place of one of your watering sessions.
However, be careful not to overwater, as this can lead to root rot. Keep the area around the roots clear of rotting plant debris which can turn into fungal problems with a higher level of moisture.
Maintaining consistent moisture becomes more critical during hot, dry periods. Use mulch around your plants to help retain moisture in the soil and regulate the temperature. Additionally, it’s beneficial to water your plants early in the day to avoid excess evaporation.
Fertilizing Dill in the Garden
Dill is a relatively hardy herb and typically doesn’t require a lot of fertilizer. However, a little extra nourishment can go a long way in promoting healthy growth. Apply a balanced, slow-release fertilizer at the time of planting. Use a rate at 1/2 of the package instructions for the amount. Over-fertilizing can lead to excessive foliage growth and less flavorful herbs.
Other Things to Know about How to Grow Dill
Letting Dill Go To Seed
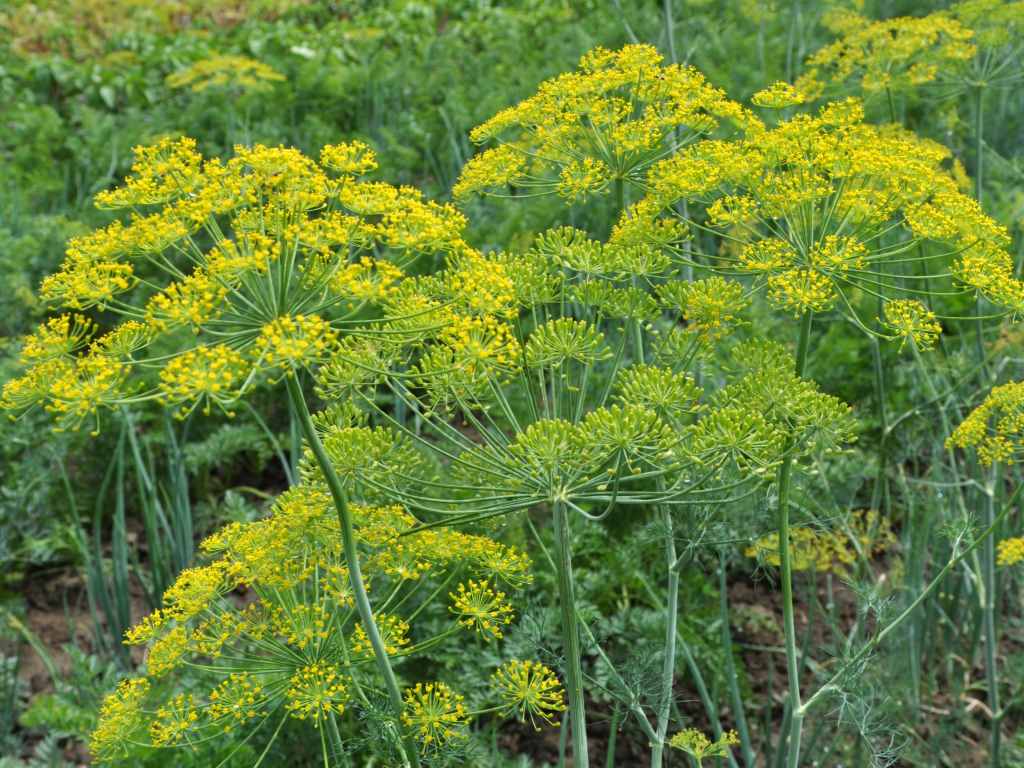
The umbrella-shaped flowers (called umbels) of dill plants provide a beautiful and fragrant addition to your garden while serving as a natural seasoning for your favorite dishes.
After about 12 weeks, seed heads will start to form on your dill plants. At this point, you should cut back on watering and let the seed heads dry. You’ll find that the leaves lose most of their flavor once the plant goes to seed.
Dill reseeds itself quite easily. So if those dried seeds fall to the ground they are highly likely to come up on their own next spring. When planning your fall harvest it’s also time to consider if you will plant dill in the same location. If not, try to capture all the seeds. But if you love that spot for your dill, just let them fall to the ground.
Companion Planting
Remember that dill plants also benefit from the presence of beneficial insects like ladybugs and pollinators. Planting dill near other fragrant herbs can help attract these helpful creatures and improve the overall health of your garden.
Dill makes a great companion plant for various vegetables and herbs since it attracts beneficial insects like ladybugs and pollinators. It is beneficial to have dill planted near cabbages and other Brassicas. It is also a good companion for corn, cucumbers, lettuce, and onions.
Be cautious not to plant dill too close to fennel, carrots, and other members of the carrot family as they can cross-pollinate and the resulting seeds will produce unexpectedly poor flavored plants.
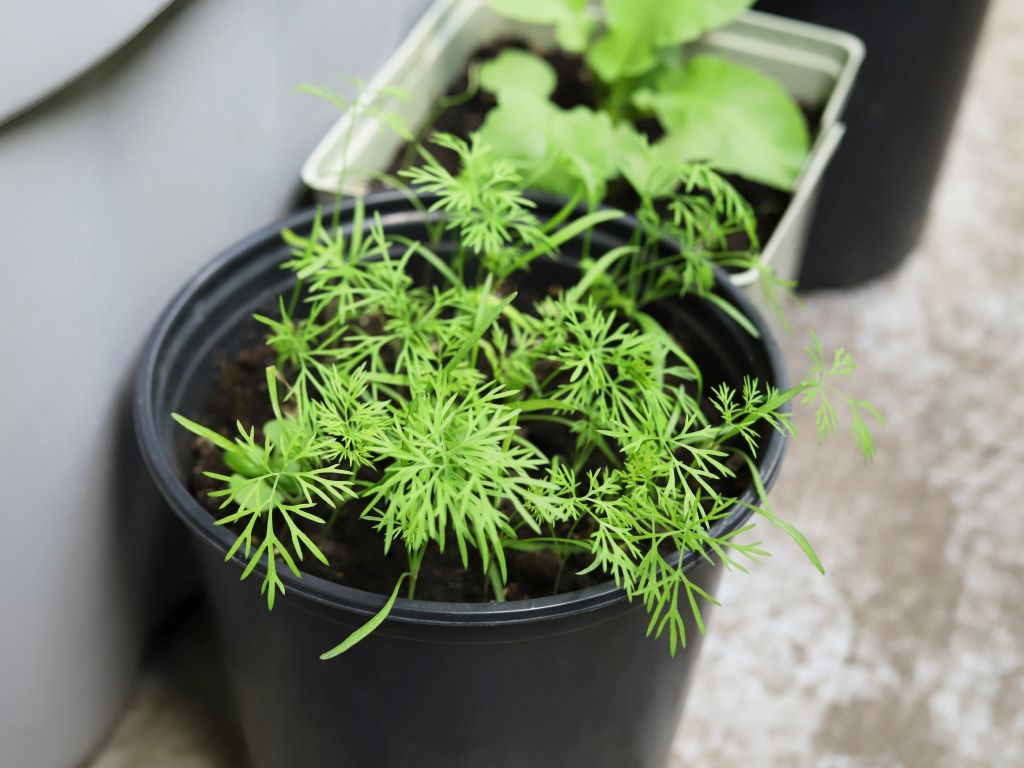
Growing Dill in Pots
Growing dill in pots is not ideal, this tall plant with a deep tap root is much better suited to growing in garden beds. However, with a little forethought and attention to dill’s basic needs, you can successfully grow this herb in containers.
How to Grow Dill in Patio Pots
If you have a very sunny patio or deck, dill can be included in your container herb garden. Remember, dill needs 6-8 hours of direct sunlight to thrive. It’s also a tall plant that won’t do well in a windy location so a protected patio can be ideal.
To start, choose a suitable container that is at least 12 inches deep and has drainage holes. A deep container allows the plant’s long taproot to grow comfortably. The deeper the pot the better to let those roots stretch. Fill the container with well-draining, fertile soil enriched with organic matter.
Sow dill seeds directly in the container, since dill doesn’t transplant well due to its long taproot. The ideal soil temperature for germination ranges between 60 and 70 degrees Fahrenheit. You can start your container dill inside if outdoor temperatures are still cool in the spring and move it outside after the risk of frost has passed. Place the seeds about 1/4 inch deep and about 1 to 2 inches apart. Thin the seedlings after germination to 6 inches apart to allow dill plants to grow freely.
Keep your dill healthy by maintaining consistent moisture. Mist the soil regularly to keep it moist but avoid overwatering, as dill doesn’t like wet soil. How often you need to water will depend upon the pot size and the weather. Check the top layer of soil often and water when the top inch is dry but before the whole pot dries out.
Dill doesn’t need much fertilizer so adding a slow-release fertilizer at 1/2 the printed rate can assist in healthy growth. I’m a big fan of Osmocote fertilizer for my potted herbs and have had great results.
Growing Dill Indoors
It’s not impossible, but growing dill weed indoors is more challenging. The biggest challenge is finding a location for its need for direct sun. If you can overcome the light requirement, then you will be challenged with a plant that wants to grow very large. When growing indoors, prune your dill often to keep it compact. I don’t recommend letting it flower and go to seed unless you have a very large space for this herb to spread out.
Common Problems and Solutions
Dill rarely has problems when growing in a healthy garden. In fact, it usually brings more value to the garden by attracting healthy pollinators like bees, butterflies, and hoverflies. It also draws into your garden helpful insects like parasitoid wasps that feed on harmful caterpillars and ladybugs that eat aphids. Parsley worms, the larva of swallowtail butterflies are also found on dill.
Disease Management
Dill’s love of moist soil can also make it occasionally to diseases that thrive in damp environments.
- Powdery mildew, which appears as white powdery spots on the leaves. The best way to control powdery mildew is to prevent it in the first place. Ensure your dill plants have proper air circulation by spacing them adequately. If you do encounter powdery mildew, using an organic fungicide can be effective in treating the disease.
- Damping-off is another disease that can impact dill seedlings, causing them to rot and wilt. To avoid this issue, make sure your dill seeds are planted in well-draining soil and avoid overwatering. If you notice damping-off on your seedlings, remove and dispose of the affected plants, and be sure to sanitize your gardening tools to prevent further spread. Since this impacts seedlings early in the growth process you’ll have time to replant in another location, away from the original infestation.
Common Pests
Generally, dill does not have problems with insects. But if you do see leaf damage here are the most likely culprits:
- Aphids are most like on the tender new flower shoots. They are small, soft-bodied insects that grow on the most tender stems to suck out the juices. To combat aphids, try spraying the affected plants with a strong jet of water to dislodge them, or use insecticidal soap. Be sure to check regularly, as they can quickly multiply. The good news… dill also attracts beneficial insects that love to feed on aphids so this nasty bug rarely takes hold on dill.
- Caterpillars are another potential problem since dill serves as a host plant for some butterflies. If you find caterpillars on your dill, you can either handpick them off or use a product containing Bacillus thuringiensis (Bt), which is a natural bacteria that specifically targets caterpillars. However, you might just want to plant extra dill so there’s enough for you and for the caterpillars and enjoy the butterflies!
By staying vigilant and addressing these common pests and diseases, you can enjoy a healthy, thriving dill garden.
Harvesting and Using Dill
Dill is a versatile herb that can be grown both indoors and outdoors. You can start harvesting dill once the plant reaches about 8 inches tall. Typically, this occurs in the spring, although dill can continue growing through the summer and even into winter in some climates.
To harvest dill, simply snip off the feathery leaves or leaflets with scissors, starting from the top of the stem and working your way down. Be sure to leave enough foliage on the plant for it to continue growing. If you’re interested in harvesting dill flowers, wait until they’re in full bloom, which usually occurs in mid-to-late summer. Dill flowers can be used fresh or dried, adding a unique flavor to various dishes.
Storing and Preserving Dill
Once you’ve harvested your dill, it’s essential to store and preserve it properly to maintain its flavor and freshness. For short-term storage, wrap fresh dill sprigs in a damp paper towel and place them inside a plastic bag before storing them in the refrigerator. This method will keep dill fresh for up to a week.
For longer-term storage, you have a few options:
Freezing Dill
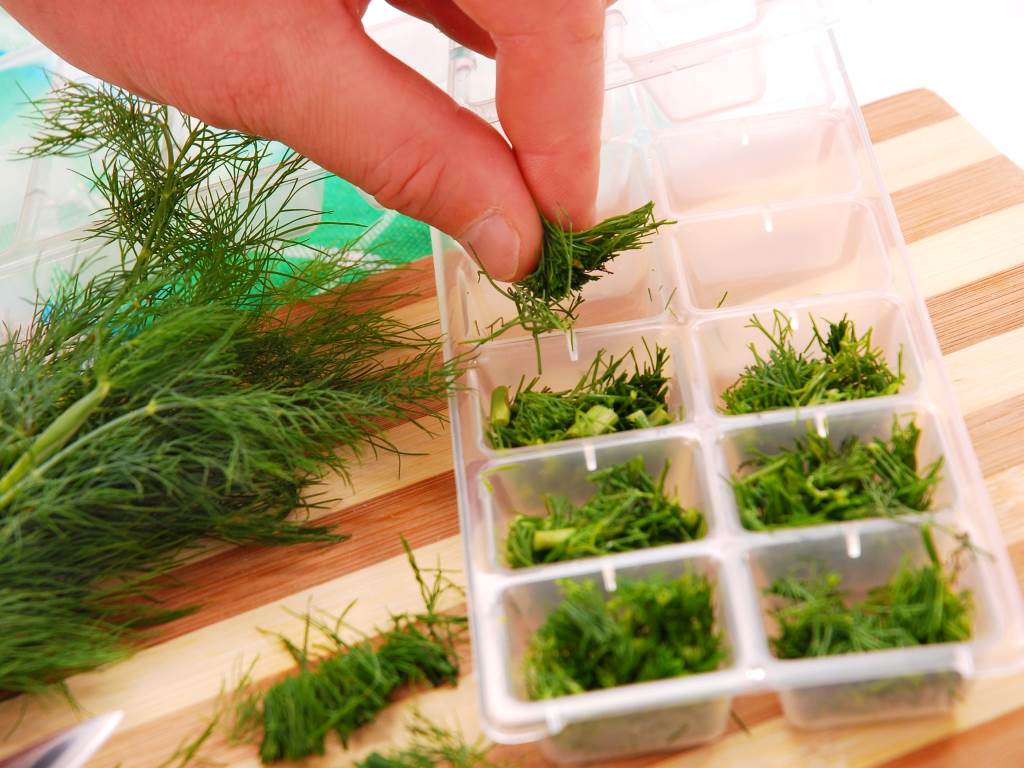
Freezing dill is the best way to maintain the pungent flavor of this herb. My favorite way is to make ice cubes because it allows me to take out small portions as needed so there is no waste.
- Finely chop up dill
- Press into small ice cube trays.
- Add enough water to cover and then freeze.
- After the cubes are frozen transfer to freezer bags to store.
- Thaw the cubes as needed.
- If using in a recipe where you don’t want the extra water, make sure to pat the leaves dry before adding.
Alternatively, you can freeze in freezer-safe containers or plastic bags without the water. The challenge with this method is making sure to remove as much air as possible before sealing. Air in the bag will cause the dill to age faster. For this method, I’d suggest using a vacuum sealer machine to remove all possible air.
Frozen dill can be stored for up to 6 months.
Drying Dill
You can also dry dill for storage. Drying will lose some of the flavor but is still a great way to save your abundant crop for the winter.
You can dry several different ways but air drying is the preferred method to retain the most flavor. Air dry sage by grouping the harvested leaves or flowers into small bundles and hanging them upside down in a dark, well-ventilated space until completely dry. Once dried, store the dill in an airtight container away from direct sunlight.
For a quicker way to dry dill, you can use a dehydrator or an over.
Enjoying Dill in Recipes
Fresh dill that you’ve grown in your garden is perfect for summer recipes when the taste of this annual herb is at its peak. As your dill seedlings grow into mature plants with bright yellow flowers, you can use their fresh, delicate leaves to enhance the flavor and color of your meals.
Culinary Uses of Dill
Try adding dill to salads for a refreshing twist. It pairs especially well with vegetables like cucumber and tomatoes. You can also use dill as a garnish for soups, and its feathery texture will add an appealing visual element to your dishes.
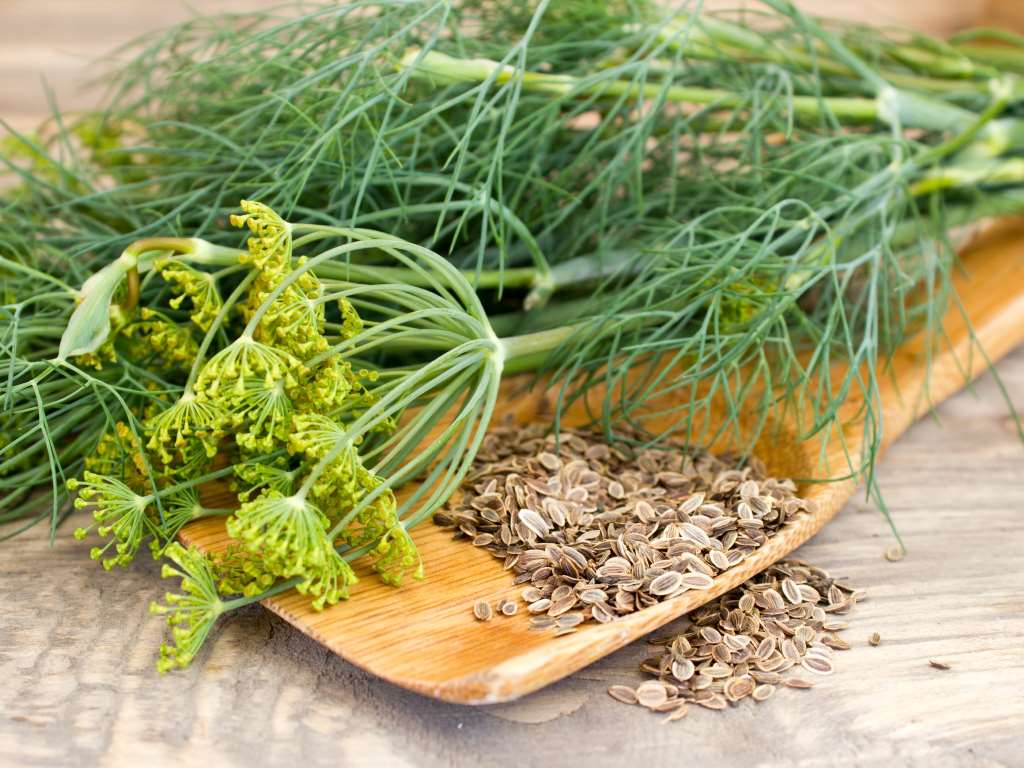
Although dill leaves are often the focus of recipes, dill seeds provide their own unique flavor and culinary benefits. As a member of the same family as caraway and fennel, dill seeds have a similar, aromatic taste, which can add depth to dishes like pickles, stews, and bread.
Here are some ways to use dill seeds in your cooking:
- Pickling: Dill seeds are an essential ingredient in many pickling recipes. Try using them in jars of pickled cucumbers, beets, or onions for a delicious, tangy snack.
- Breads and Crackers: Adding dill seeds to homemade bread and cracker recipes can provide a tasty, unique flavor. They also add a nice crunch factor to your baked goods.
- Spice Blends: Dill seeds are often included in various spice blends, particularly ones originating from Eastern European and Middle Eastern cuisines. Try using them in your own homemade spice mixes for a unique touch.
Keep experimenting with different recipes and enjoy the many culinary possibilities that dill offers
Frequently Asked Questions about Growing Dill
Dill grows best in well-draining, slightly acidic soil. Add organic matter to the soil before planting dill for the healthiest plants.
Dill prefers moist soil. Water regularly but avoid waterlogging. Typically, a deep watering twice a week, adjusting for rainfall, should grow healthy dill.
Dill is a sun lover and doesn’t tolerate much shade. It requires 6-8 hours of full sun for optimal growth and flavor. If you grow dill indoors, it must be in a full sun window and even then will probably grow leggy and require staking to support the stems.
Yes, dill regrows after cutting. Harvesting dill frequently encourages bushier growth. For the best flavor, harvest dill in the morning before the day’s heat.
No, dill is an annual herb, which means it completes its life cycle in one growing season. However, if a dill goes to seed in your garden, it often self-sows and returns the following year. That makes it seem like dill is a perennial, confusing some gardeners.
Last Thoughts on How to Grow Dill
Growing dill in your garden is incredibly easy and rewarding. No beginning herb garden should be without this healthy culinary herb. By following the steps outlined in this guide on how to grow dill you will cultivate a flourishing dill plant with a robust aroma and flavorful leaves.
Remember to harvest dill regularly so it continues to produce an abundance of healthy leaves. Whether you use it fresh in salads, soups, and sauces or dry it for later use, dill can elevate the taste of various dishes. So go ahead, roll up your sleeves, and start sowing the seeds of dill success in your garden!