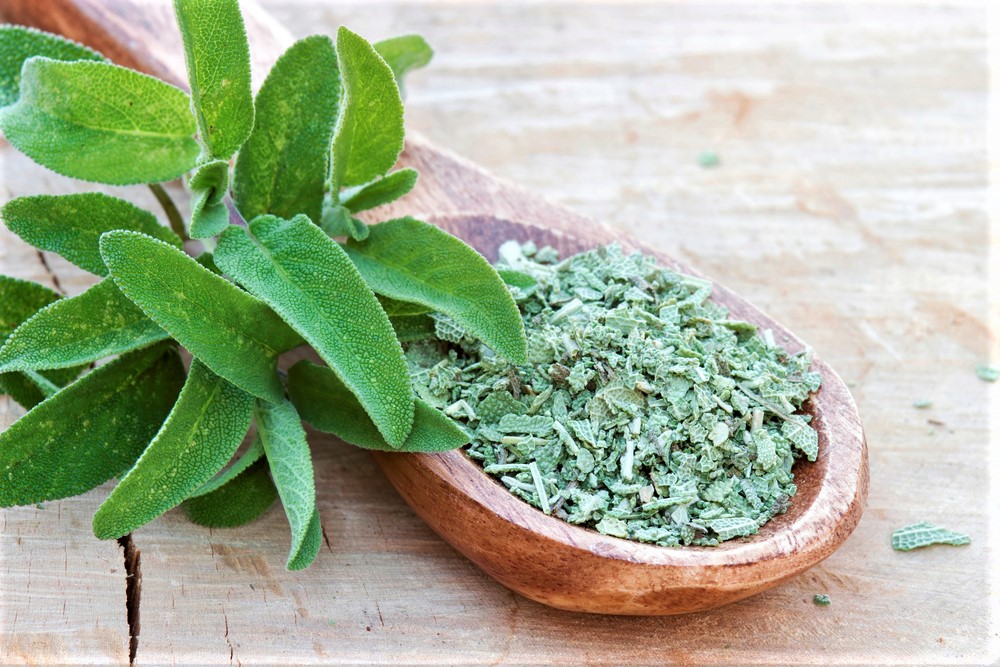
Sage is one of my favorite herbs due to its intense fragrance and amazing earthy flavor in foods. I keep a sage plant growing in my kitchen window for quick plucking of leaves. However, summer brings an abundance of sage into the garden which is the perfect time to dry fresh sage for cooking. In this article, we’ll share how to dry sage using 6 different methods and the pros and cons of each method.
Here are the 6 methods for drying sage that I will cover:
- How to Air Dry Sage
- How to Hang Dry Sage in Bunches
- How to Dry Sage in a Dehydrator
- How to Dry Sage in the Oven
- How to Dry Sage in a Microwave
- How to Dry Sage with an Air Fryer
Feel free to pop on down to any one of these methods using the links above.
Why You Should Dry Your Own Sage
The best reason to dry sage is that you have an abundance of fresh sage. Sage is so easy to grow in your garden or in pots. Or if you purchase fresh sage at the market for your special dish, dry what’s left over for future use.
Or, you might be caught in a pinch with a recipe that is better served with dried sage over fresh. Knowing how to quickly dry a bit of sage will solve your dilemma.
The other advantage of drying your own sage, especially from your own garden, is you know exactly what’s in that jar. No herbicides, no ground-up bugs, and no preservatives in your dried sage jar.
Sage is easy to dry and it retains its wonderful piney flavor throughout the process. Soft-leaved herbs, such as basil and parsley, lose a lot of their flavor when dried, but firm leaf herbs like sage hold their flavor well. That makes dried sage perfect for substituting for fresh sage in most recipes. So by drying your own sage, you’ll have plenty of this wonderful herb on hand all year around.
Here’s our step-by-step guide to drying sage. We’ve included links to a few products that might help you as you dry your sage, those are affiliate links and we’ll earn a small commission if you make a purchase.
How to Harvest and Prepare Sage for Drying
Preparing sage for drying is a very low-effort activity. You’ll be done in just a few minutes and ready to move on to dry it.
How to Pick Sage in Your Garden
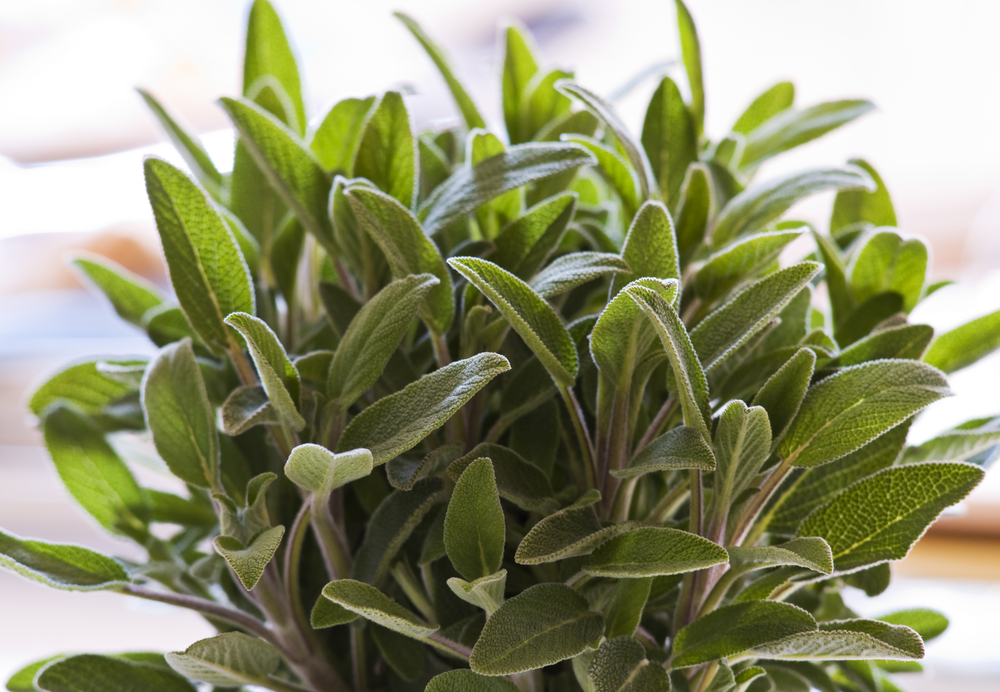
The best time to pick sage for drying is mid-summer before the sage plant blooms. Once sage sets flower buds, the leaves will be a little bitter as more of the plant’s energy goes into growing those lovely flowers instead of the leaves. You can usually get 2 cuttings during the summer from your sage plants.
Just like most other herbs, sage is best when harvested in the morning. During the night, herb leaves take up water that they lost during the day making the leaves stronger and moister. The starches formed during the previous day are converted to sugars during the evening. This increases the flavor and sweetness of the sage leaves in the morning.
To cut sage, snip the stems leaving at least 1/2 of the leafy portion of the stem behind. If you cut the sage plant too short there won’t be enough leaves to provide food for your plant to continue to grow quickly. Because the stems are slightly woody, scissors work better than trying to break them off with your fingers.
Of course, if you just need a little bit of sage for dinner feel free to pluck off a handful of leaves. You won’t hurt the plant at all!
How to Select Fresh Sage in the Grocery
Sage in the grocery is usually sold in small bundles, although occasionally you can find just the leaves. Look for leaves that have maintained their firmness. If the leaves are droopy or withered, you might as well purchase dried sage as those sad sage leaves won’t have much flavor.
Preparing Sage before Drying
- Make sure the leaves are free of soil, bugs, and other debris. Organically grown herbs should only need a rinse in cool water to dislodge unwanted debris. Warm or hot water will remove some of the flavorful oils in the leaves.
- Before starting any of the drying methods, dry the leaves by spreading them out on a towel in an area with good circulation. If you have a salad spinner, take the leaves for a quick spin to expedite the process. It might seem a bit contradictory to dry your sage leaves before you “dry” them. But wet leaves will dry unevenly and sometimes even mold. The moisture will also increase the humidity in an oven or dehydrator increasing the overall drying time.
- Remove the sage leaves from the stems, picking only healthy leaves without yellowing or spotting. You can remove the leaves before or after washing, it doesn’t matter. Toss those stems, they have a bitter flavor.
How to Dry Sage at Home: 6 Easy Methods
You might ask which of these methods is the best way to dry sage at home. If space and time are not limiting factors, then naturally air-drying sage will give you the freshest flavor. However, there are times when other methods make more sense. In the notes about each method I’ve included tips to help you choose which is best for you.
Method 1: Naturally Air Dry Sage
The best method to dry sage is to naturally air dry it on drying trays. Drying sage in a cool, dry, ventilated, and dark environment will retain the most flavor. Naturally air-drying sage is also the cheapest method, you don’t need any special equipment.
Naturally Air Drying Sage is super simple. You just wash the leaves and spread them out on trays. Place the trays in low light, low humidity, and a well-ventilated environment, and then sit back and wait.
So why do people use any of these other methods? Because properly air-drying sage takes time and space. If you want the process of drying sage completed quickly with the least mess and clutter, then look on to the other methods listed below.
Instructions: How to Air Dry Sage Leaves
- Remove leaves from the stems and spread the sage leaves out in a single layer on the drying racks. You have a variety of choices for drying trays. I really like the inexpensive hanging mesh trays since you can dry a lot of herbs in a small vertical space. You can also get stacking trays at a reasonable price. If you have room to spread out, recycled window screens also work amazingly well since they allow for bottom ventilation. And many beginners use a baking sheet that is readily available in their cabinets. If using a drying rack without bottom ventilation you will need to turn your leaves more often to ensure they dry evenly.
- Place the sage leaves in a dry low-light room. Remember, you need low humidity and good air circulation for the leaves to dry. And you don’t want any direct sunlight as it will cause the leaves to wilt rather than dry evenly.
- Mid-week turn the leaves over to ensure that they dry evenly.
- After a week, examine the sage leaves. If they are dry and crunchy between your fingers they are ready to put into jars. If they aren’t ready, check back in a couple of days until the leaves are thoroughly dry. It’s better to let them dry an extra day if you are unsure. Under-drying can result in sage molding once put in jars.
Method 2: Air Dry Sage by Hanging Stems in Bundles
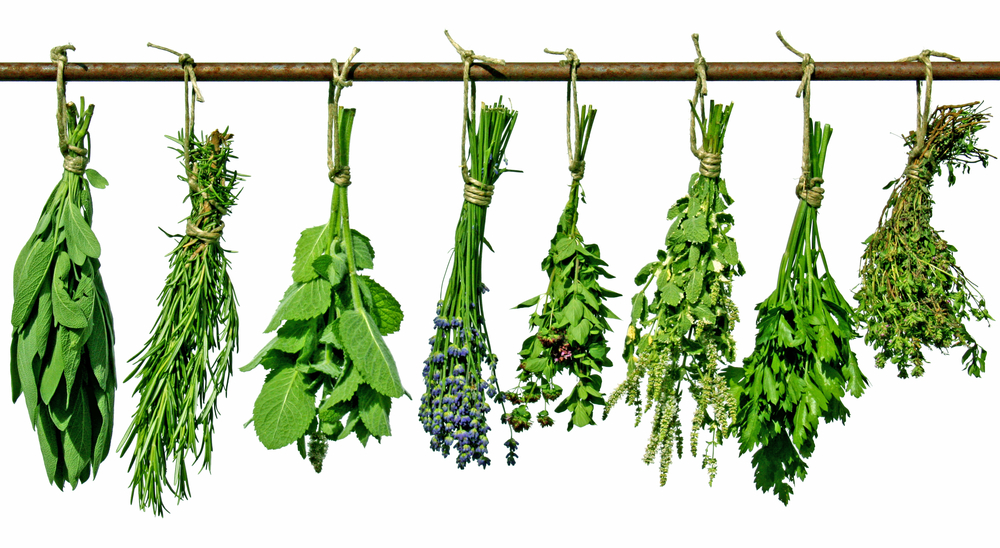
I’m sure you’ve seen many adorable pictures of herb bundles hanging dry in kitchens. Well, that is just for decoration and not the way to dry your sage if you want flavorful seasoning.
As long as you have the same environment as used in tray drying your sage, it is possible to hang your sage in bundles to dry. That drying environment must be dry, cool, well-ventilated, and low-light for the best flavor after drying. Drying sage in hanging bundles is perfect if you happen to have more overhead space than counter space. I have dried sage hanging from rafters in the basement in a room that has a dehumidifier running. And you’ll often find people use this method in their gardening shed where they can a small fan.
The biggest mistake I see people make when drying in bundles is making the bundle too big. Then the inner leaves don’t get proper air circulation and fail to dry evenly. And for this reason alone, I prefer the drying tray method over the bundle method.
One last word of caution – in using the air drying bundle method carefully remove the dried leaves from the stems so you don’t break any stems into your herbal mix.
Instructions: How to Air Dry Sage on Hanging Bundles
- Start with sage stems 6-10 inches long. Pick off any damaged or unhealthy leaves before bundling.
- Bundle 3-4 stems together with twine. Leave about 8 inches on the end of the twine and tie it into a loop for easy hanging. You might be tempted to tie the twine onto your hanging hook or nail, but don’t. Once the sage is dry it will be brittle and you want to remove it with the least handling.
- Hang the sage bundles in a dry low-light room. Remember, you need low humidity and good air circulation for the leaves to dry. And you don’t want any direct sunlight as it will cause the leaves to wilt rather than dry evenly. If you want a great space-saving solution try hanging your bundles on a hanging clothes drying rack.
- Check your sage bundles mid-week to ensure that they dry evenly.
- After a week, examine the sage leaves. If they are dry and crunchy between your fingers they are ready to put into jars. If they aren’t ready, check back in a couple of days until the leaves are thoroughly dry. It’s better to let them dry an extra day if you are unsure. Under-drying can result in sage molding once put in jars.
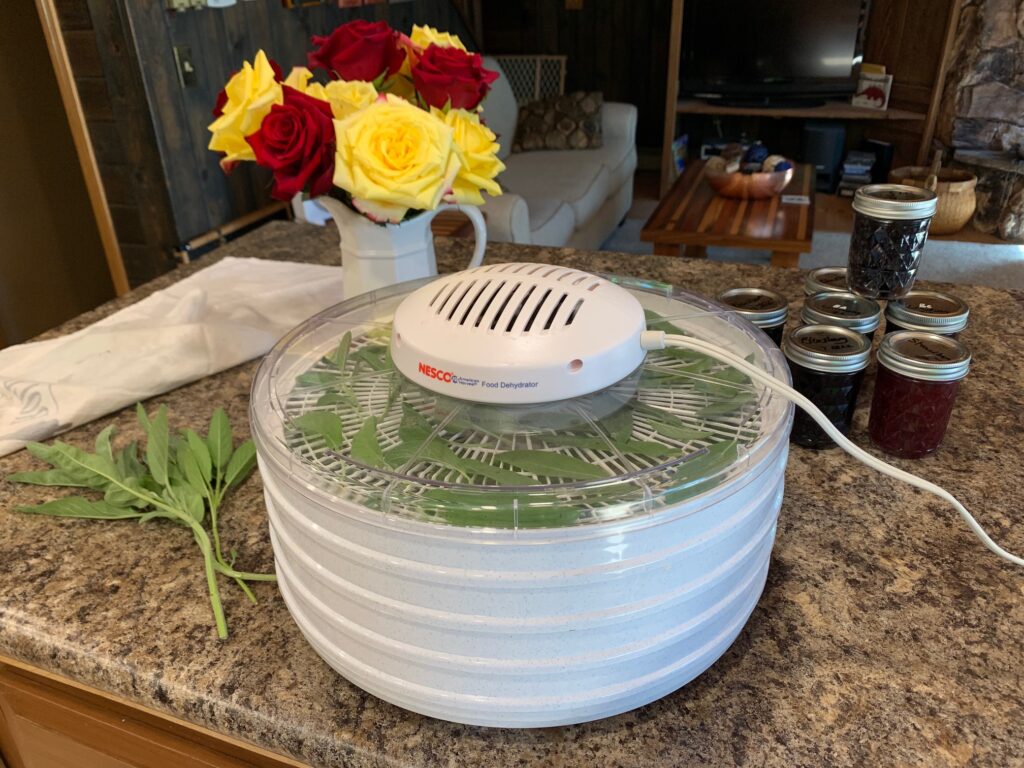
Method 3: Dry Sage Leaves in Food Dehydrator
My personal favorite way to dry sage is in the dehydrator. With a dehydrator, you can wrap up the work and the mess in one afternoon. So when the motivation strikes, I’m able to get the job done. I also love getting rid of clutter quickly!
Yes, the air-drying method is the best for retaining flavor. However, if a food dehydrator is used properly there is very little loss of flavor. This is especially true when working with an herb as pungent as sage.
The best food dehydrators have adjustable temperatures, usually in the 95-150 degree range. For herbs, you want very low heat so without this control you will usually overdry the leaves in a dehydrator, removing the oils.
A dehydrator feature of a timer is also a great option. It’s difficult to know the exact amount of time your sage leaves will need in a dehydrator so you can’t just set it and go. The purpose of the timer is to allow you to shut it off automatically if you have to run an errand. I don’t know about your, but something always seems to crop up when I’m in the middle of a project!
The good news is that you’ll find dehydrators in the range of $30 to $150. And at the low end, you can find quality dehydrators that work perfectly for drying herbs. At the high end, you’ll find multi-purpose dehydrators with all the bells and whistles.
Instructions: How to Dry Sage Leaves in Food Dehydrator
- Set your food dehydrator around 105°F or 40°C.
- Place dry fresh sage leaves on the dehydrator trays. Spread them out so the leaves have their own space. In the photo above I spread out sage leaves more than you need to, you can double what I’m showing and still get good circulation.
- After the first hour, check for dryness. It can take 1 to 4 hours for the sage leaves to dry completely, so check every 30 minutes until they are completely dried. This is where a timer comes in handy. If you have to leave the house you can set the timer for another 30 minutes and then check when you return.
- Let the leaves cool on the dehydrator tray for a couple of hours before packaging. It’s best to pull the trays out to cool, but if you don’t have space make sure you open the door or remove the lid. If any extra moisture is in the dehydrator when shut off, your herbs will absorb it if kept enclosed.
Method 4: Dry Sage Leaves in Oven
I like the oven method of drying sage if I need to hurry up the process. You can dry sage in the oven in only 1-2 hours, which is really appealing when time is short.
The oven method of drying sage is only good for small batches. You are limited to what you can fit on a single cooking sheet, compared to being able to dry many layers in the air-drying method or in a dehydrator.
Unfortunately, the lowest temperature setting in an oven is usually around 170 degrees, which is not optimum for retaining the fragrance and flavor of any herb. That also means you need to closely monitor the drying process, checking your sage leaves often to ensure you don’t over-dry them.
Instructions: How to Dry Sage Leaves in Your Oven
- Set your oven to the lowest setting. It will also help to leave the oven door cracked a bit to let the air circulate. If your oven doesn’t allow the door to be left open check the process a little more often to let any moisture escape.
- Arrange the fresh sage leaves in a single layer on a large baking sheet. The leaves should be dry from your washing process before you put them in the oven so you don’t create any extra humidity.
- Bake for 30 minutes then turn leaves over. Continue to check and turn the sage leaves every 15 minutes until they are dry. They usually take 60-90 minutes to completely dry.
- Completely cool before storing. Since you’ve added extra heat it’s best to let them cool for 3-4 hours.
Method 5: Dry Sage Leaves in the Microwave
Drying sage leaves in the microwave is perfect if you just need a little bit of dried sage for a recipe. However, it’s not very practical for large batches. A plate full of leaves will only yield a tablespoon of dried sage.
It will only take a couple of minutes to dry your sage leaves. However, using the microwave method also requires 100% of your attention as you must keep checking the progress to avoid over-drying or burning the leaves.
Instructions: How to Use the Microwave to Dry Sage Leaves
- Place a handful of sage leaves on a microwave-safe plate. I like to use a paper towel under the leaves so they don’t pick up heat from the plate. Ensure the leaves are evenly spread out so they do not touch each other.
- Microwave on high for 30 seconds then turn each leaf over. It will take two to three minutes but check them every 30 seconds. If the leaves begin to blister they are overcooked so it’s best to take this process slowly.
- If in doubt about timing, you can always partially dry the sage leaves in the microwave and let the leaves finish the process by air-drying overnight.

Method 6: Drying Sage with an Air Fryer
A handful of multi-functional air fryers are now built with a dehydrator setting. Before using your air fryer dehydrator, check the manufacturer’s info on the temperature used for dehydrating. You’re looking for a temperature under 135 degrees, and the lower the better for retaining the maximum flavor.
The biggest advantage of using your air fryer is that you aren’t taking up any additional space to dry your sage. It’s pretty slick to have an appliance that can serve so many functions in one compact space. It’s a great solution for small-batch drying of sage.
Unfortunately, home air fryers without a dehydrator setting get too hot to dry herbs. The excessive heat will destroy the flavor and fragrance of sage. And depending on the air fryer, you may be limited on the amount of space available for drying your sage.
Instructions: How to Dry Sage in Air Fryer
- Spread leaves out in a single layer. If your air fryer has trays, spread them out on the trays just as you would in a traditional dehydrator.
- Place on a heat setting of 105 degrees.
- Check your sage leaves every 30 minutes until dry. It will usually take 2-4 hours.
- Let the leaves cool at room temperature before storing.
Tips for Storing your Dried Sage
Now that you have all this beautifully dried sage, it’s time to grind it and then store the sage for future use. Make sure the sage leaves are completely cool before beginning the grinding process.
How to Grind The Sage Leaves
Generally, sage leaves are ground before storing so they are ready to use. If you have an abundance of leaves you may want to grind some to a fine texture and leave some coarsely crushed and stored separately. That way you can use the texture that best fits your recipe
I prefer to use my fingers to crush the sage leaves before grinding because I prefer to pull out the leaf stems. Then I place it in my Magic Bullet to get a fine grind before storing the sage. However, removing the leaf stems is not required as they will grind up easily. You’ll find coffee grinders work well for grinding herbs.
How to Store Dried Sage
For the longest retention of flavor from your dried stage, store it:
- Away from sunlight. Even though your jars of dried herbs look lovely in the kitchen, the light will cause them to lose flavor quicker.
- In a sealed container to keep out moisture.
I’m lucky and have space in my cabinet for my herbs so using clear jars is a low-cost and easy way to store my dried sage. Here are a couple of examples I found on Amazon that are cute and functional:


However, if you need to store your dried herbs on your countertop or in a wall rack where the sun will hit them you need a container that blocks the light. A simple and inexpensive solution is to cover the outside of the jar with a label or adhesive paper. You can also purchase herb jars that have UV-filtered glass like these herb and spice jars.
FAQs about How to Dry Sage
While washing sage will remove some of the oils, it doesn’t have enough of an effect to justify skipping washing the leaves to ensure all dirt and pesticides are removed. However, if the sage is from your own garden and you know it to be clean and pesticide free, then you can skip the washing process.
Properly freezing sage will retain more of the original oils. The downside of freezing sage is it will take up more storage space than drying.
I prefer to take sage leaves off the stems before drying because the dried stems easily crumble and get mixed in with your leaves. I think the stems have a bitter flavor so it’s better to avoid them in your mix. The exception is if you are bundling sage stems to hang dry.
Sage is a perennial, which means it will grow back from its roots every year. It does best as a perennial in zones 5-8, although it will often survive in the adjacent zones 4 and 9-10.
A Few Last Thoughts on How to Dry Sage
It wasn’t until I started drying my own sage that I understood the amazing flavor this herb can bring to foods. Store-bought dried sage just doesn’t begin to compare. The steps on how to dry sage are super simple, so I hope you’ll give it a try.