The flavor of a bay leaf adds so much to soups, stews and pasta sauces. If you are blessed with a Sweet Bay Tree (Laurus nobilis), you’ll enjoy harvesting and drying your own bay leaves. You can also dry bay leaves purchased at the market, so you always have flavorful bay leaves on hand. In this article, we are going to share how to dry bay leaves with 4 different methods and talk about the pros and cons of each.
Why You Should Dry Your Own Bay Leaves?
Without a doubt, Bay leaves are wonderful to use fresh. According to Rachel Ray “Fresh bay leaves have a lighter, more floral flavor, and they keep for weeks in the fridge.”
But keeping fresh bay leaves on hand can be a challenge. So the next best thing is to dry your own because they will be substantially fresher and more flavorful than the dried ones you can buy in the store. Open a jar of store-bought dried bay leaves and you can really tell the difference.
You’ll also save a ton of money drying your own. I just did a quick comparison at our local market. Dried organic bay leaves ran between $7 to $11 for a dozen leaves. Wow! Imagine each one of those little leaves on your sweet bay tree as a dollar bill. If you happened to buy fresh bay leaves think about the dollars you are throwing away if you can’t use the whole bunch.
Why waste those babies when drying them yourself is so easy!
When you have an abundance of bay leaves, beyond what you can use in a few weeks, it’s time to dry them for future use.
Harvesting Bay Leaves From Your Garden
Before you start harvesting from your garden wait until your Bay Tree is at least 2 years old so it has a chance to establish itself. You’ll have a healthier, long-living tree if you give it time to develop a strong root system and to grow healthy branches.
The best time to harvest bay leaves to dry is in the morning after the sun has dried any overnight dew off the leaves.
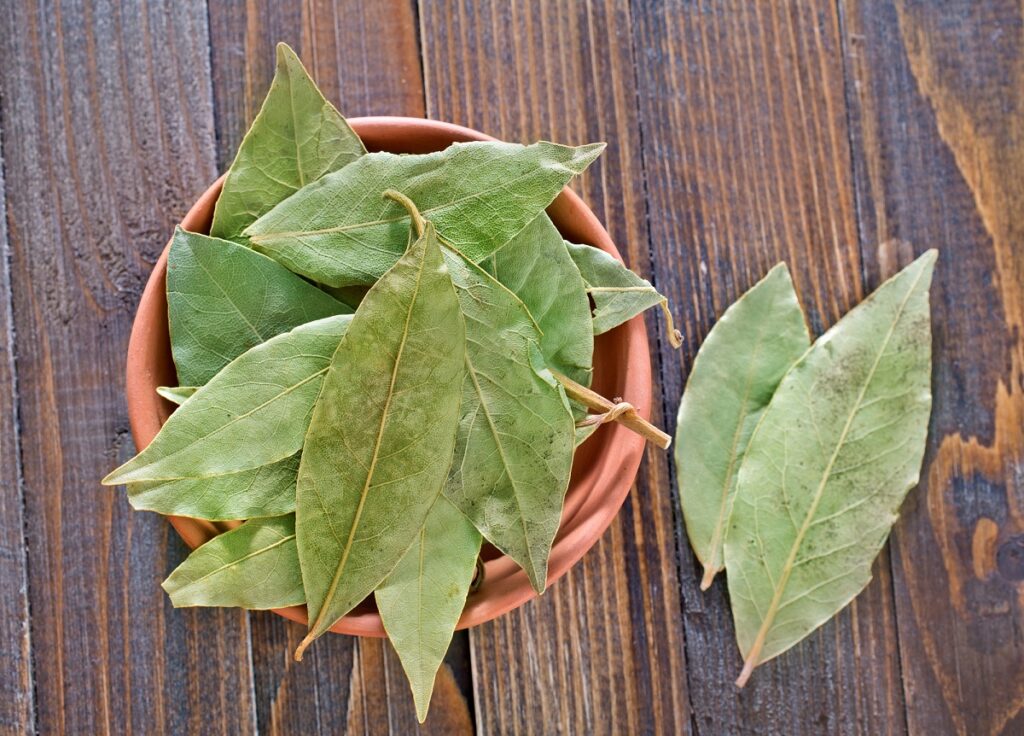
- Find dark green leaves with no blemishes or damage. The leaves have a more intense flavor when older so pick mature leaves out of a bay tree for an ideal taste.
- Avoid leaves that are yellowish or brown as these old leaves will be bitter or flavorless.
- Use sharp scissors to retrieve leaves from the bay tree, cutting close to the stem. Clean cutting is less likely to damage the parent plant.
Selecting Fresh Bay Leaves at your Market
No Sweet Bay tree in your yard? No worries! You can often purchase fresh high-quality organic bay leaves at your market. Of course, use a few fresh while you can. But then follow the same steps to dry the rest for the best dried bay leaves!
Always pick mature dark green leafy leaves. If they don’t look super fresh, they are not going to taste good and are not worth drying.
Preparing Bay Leaves before Drying
By all means, thoroughly wash the leaves before you start the drying process. Putting them in a colander and running a gentle stream of cool water to rinse the dust off is usually adequate for organically grown herbs.
For best results, you should spread out the leaves and dry them. Many people use a layer of paper towels to absorb the remaining moisture left after washing. I like to pat dry with absorbent dish towels so I’m not wasting so many paper towels. If you are using any drying method other than air drying, you don’t want to leave excess water on the leaves because the water drops will increase the humidity inside your oven or dryer making it harder to dry the leaves.
4 Simple Methods to Dry Bay Leaves at Home
Drying bay leaves is really quite easy. While natural air drying usually preserves the most flavor, you probably won’t be able to tell the difference between other methods if you follow the instructions. Methods like drying in the oven and microwave are huge time savers. And using a dehydrator will let you dry a large number of leaves with very little hassle. Let’s take a look at each.
Method 1: Naturally Air Drying Bay Leaves
Air drying just might be the cheapest way to start drying bay leaves at home since no special equipment is required.
CONS: It’s also the messiest because you have the leaves spread out drying for weeks. So unless you have a high tolerance for clutter or have lots of extra space air drying might not be your first choice.
Another concern with using the natural method of air drying bay leaves is it requires a dry room with low humidity to avoid the risk of mold developing over the 2 week drying period. That often rules out using out-of-the-way spaces like your basement or an outdoor shed for herb drying at certain times of the year.
PROS: The best reason for the air-dry method is when you dry bay leaves naturally, you preserve the flavor best. Anytime you apply heat oils break down and you lose some of the flavors in your herbs.
Instructions to Air Dry Bay Leaves
- Spread the leaves out in a single layer on the drying racks. You have a variety of choices for drying trays. I really like the inexpensive hanging mesh trays since you can dry a lot of herbs in a small vertical space. If you have room to spread out, recycled window screens also work amazingly well since they allow for bottom ventilation. And many beginners use a baking sheet that is readily available in their cabinets.
- Place the leaves in a dry low-light room for a week. Remember, you need low humidity and good air circulation for the leaves to dry. And you don’t want any direct sunlight as it will cause the leaves to wilt rather than dry evenly.
- After a week turn the leaves over to finish the drying. This will ensure that the leaf dries evenly.
- After the second week, examine the bay leaves. If you don’t see any soft or bright green spots they are ready to package for storage. If you do, then check back in a couple of days until the leaves are thoroughly dry.
Alternate Instructions for Air Drying on the Stems
Rather than spreading the leaves out on trays, you can choose to clip stems from your sweet bay trees and hang those stems to dry. This does require that you have a large bay tree, mature enough to handle full stems being cut off. However, if you are lucky enough to have that tree, hanging branches to dry is easy.
The same rules still apply though… You need a well-ventilated, low humidity space. And if hanging more than one branch, give each one plenty of space so air can move around the leaves. You don’t want the branches touching each other.
Method 2 How to Dry Bay Leaves with a Food Dehydrator
Food dehydrators are a great choice for drying bay leaves. It’s the most efficient way to dry large quantities while retaining the flavor of the bay leaves.
CONS: Obviously the biggest downside is that you must own a food dehydrator. Although there are a lot of them available at low prices, if you are going to use them for more than a few herbs here and there, you will likely want to invest in a dehydrator of higher quality.
PROS: Most important, the very low heat levels that food dehydrators use help retain the flavorful oils in the bay leaves.
You’ll also find yourself able to dry a large number of other herbs at the same time. You can place bay leaves on their own dehydrator trays with other baking trays fill with additional plants from your harvest creating a very efficient process.
Instructions to Use a Food Dehydrator to Dry Sweet Bay
- Set your food dehydrator around 105°F or 40°C.
- Place fresh bay leaves on the dehydrator trays. Spread them out so the leaves have their own space.
- After the first hour, check for dryness. It can take 1 to 4 hours for the leaves to completely dry so continue to check every 30 minutes until they are completely dried.
- Let the leaves cool on the dehydrator tray for a couple of hours before packaging.
Method 3: How to Dry Bay Leaves in the Oven
Drying your bay leaves in the oven is a much quicker process, taking less than 2 hours. Although a food dehydrator will do a better job of retaining flavor, if you don’t have one using the oven is a viable option. You just have to be a little more careful in the process.
CONS: As mentioned already, applying heat to fresh herbs diminishes the quality of the flavor. The lowest temperature setting in an oven is about twice that of a food dehydrator.
If you are like me, another challenge with using the oven for dried herbs is that you have to check the oven every 10-15 minutes. I tend to get distracted and 2 hours is a long time to keep checking back to ensure the bay leaves are not “overcooked”.
PROS: A big plus of the oven method is that it’s quick and easy. There is very little mess when you are done. And you don’t need to run out to buy a food dehydrator until you are really sure you will use it enough to make it worth the price.
Instructions to Dry Bay Leaves in the Oven
- Set your oven to the lowest setting. It will also help to leave the oven door cracked a bit to let the air circulate. If your oven doesn’t allow the door to be left open check the process a little more often to let any moisture escape.
- Arrange the fresh leaves in a single layer on a large baking sheet. The leaves should be dry from your washing process before you put them in the oven so you don’t create any extra humidity.
- Bake for 30 minutes then turn leaves over. Continue to check and turn the bay leaves every 15 minutes until they are dry. They usually take 90-120 minutes to completely dry.
- Completely cool before storing. Since you’ve added extra heat it’s best to let them cool for 3-4 hours.
Method 3: Drying Bay Leaves in the Microwave
You can also dry out bay leaves on the microwave. This is the fastest process by far, just taking a few minutes.
PROS: If you just have a few leaves to dry, for example, you bought fresh bay and want to save the leftover leaves, the microwave oven is a quick way to go.
CONS: Since drying happens so fast, it’s really easy to overcook the bay leaves resulting in burnt unusable leaves. Using the microwave is not a very efficient way to dry more than a handful of leaves.
Instructions to Dry Bay Leaves in your Microwave
- Place on a microwave-safe plate. Make sure the leaves are evenly spread out so they are not touching each other.
- Microwave on high for 30 seconds then turn each leaf over. It will take two to three minutes but check them every 30 seconds. If the leaves begin to blister they are overcooked so it’s best to take this process slowly.
- If in doubt about timing, you can always partially dry in the microwave and let the leaves finish the process by air-drying overnight.
How to Store Dried Bay Leaves
Although most sources will say you can store bay leaves for up to 2 years if properly stored, it is best to try to use them up within the first year for maximum flavor.
Just as you would for any herb or spice, store your bay leaves in an airtight container or in a sealed plastic bag away from light and heat. The best airtight container will be appropriately sized for the amount of bay leaves you have to reduce the amount of air inside also.